
Well, now it is time for a tour inside the glider. Make sure you are not taller than 1.90 m (6ft3) and not wider than the average person. Otherwise you won’t fit in the cockpit, let alone jump in. But once you manage to get seated, you have a great view, as you can see in the image below. [Assuming that you have cleaned the canopy very thouroughly.]It really feels like a small bubble.
Most of the required instruments are there, as you can see in the image above. From the top left to the bottom right, you find: a speed indicator, an analog vario, a butterfly display that is connected to a flarm.
Then you have the Altimeter, a digital variometer from Zander, a Pathfinder compass, a radio, and last in the middle a Zander ZS1 flight computer with basic navigation functionality.
Unfortunately not everything is completely functional anymore. I will replace the e-vario and flight computer this winter during maintenance season (Dec 2023-Feb 2024) and I will also install a new transponder. Other maintenance that I plan to do this winter, is restoring the flarm system, and adding a SD-card reader for software updates and logging. I will post separate blogs about these projects, regarding the instrument panel. Dashboard: build in SimNav part 1
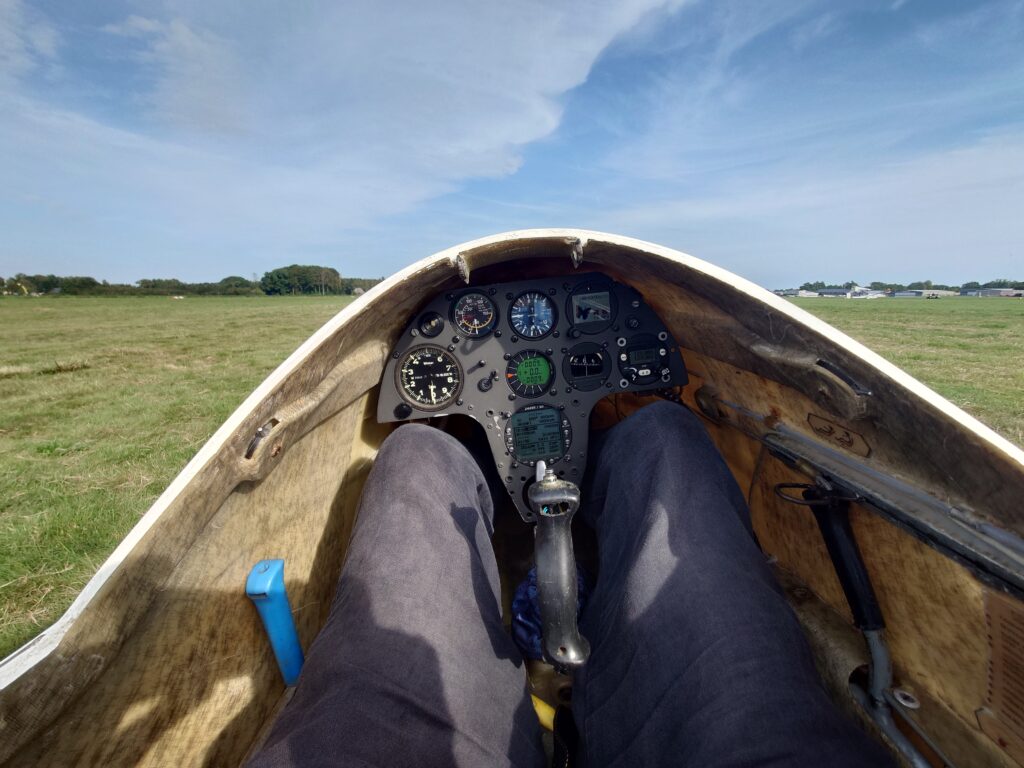
You may be able to tell from the photo, that the hull is somewhat thin. I can actually see sunlight coming through :). What you see is what you get in terms of safety. [And in case my mom reads this; Yes mom, the glider is fully proofed for airworthiness.]

Leave a Reply
You must be logged in to post a comment.